Your vision is clear; the free tools aren’t
You know what you want to publish: a clean Instagram graphic, a quick promo clip, a sharper product photo, a blog post that doesn’t ramble. The problem is the free-tool aisle is messy. Two apps can look identical until you hit export and discover a watermark, a paywalled file type, or a limit that blocks your real workflow—like no transparent PNGs, clunky mobile-only editing, or fonts you can’t actually use commercially.
This isn’t about finding “the best” free tool. It’s about matching each job to a tool that stays usable when deadlines show up and your content has to look consistent. That starts with naming the deliverable and the few deal-breakers you won’t negotiate.
Start with your deliverable and your deal-breakers
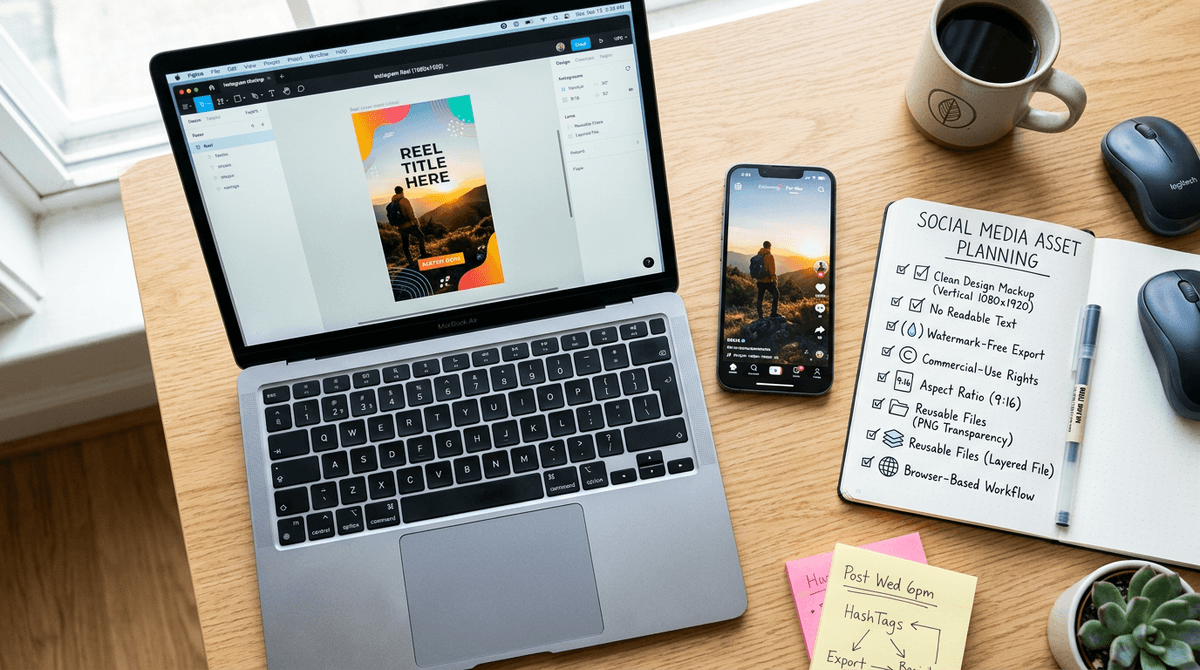
You sit down to make “one simple post,” and five minutes later you’re deciding between three editors, two template libraries, and a browser tool you’ve never heard of. The fastest way out is to state the deliverable in one sentence: “A 1080×1920 Reel cover,” “a 15-second vertical promo with captions,” or “a product photo with a clean background.” If you can’t say the output clearly, you’ll keep judging tools by vibes instead of fit.
Then list your deal-breakers before you touch a template. Common ones: no watermark on export, commercial-use rights that cover your business, the exact aspect ratios you publish in, and a file you can reuse later (PNG with transparency, layered project file, or at least a high-quality MP4). Add one workflow constraint that matches your reality, like “works in a browser on a Chromebook” or “must be doable on my phone.”
Expect at least one constraint to bite. Many “free” plans limit brand fonts, remove background only a few times, or cap export quality, so write down what you need on day 30, not just today.
Canva keeps your social graphics from looking homemade
You open a blank canvas for an Instagram post and suddenly you’re juggling alignment, spacing, and type choices that looked “fine” in your head. Canva helps because it bakes in guardrails: grids, guides, consistent spacing, and templates that already respect common sizes like 1080×1080 and 1080×1920. If you pick one template set and reuse it, your feed stops looking like a different person designed every post.
Use Canva for repeatable social work: quote cards, sale promos, carousel slides, thumbnails, simple one-page flyers. Build a tiny “brand kit” even on free—two fonts you’ll stick to, 2–4 colors, and a logo file—then duplicate designs instead of starting over. The real snag is that some elements, exports, and brand controls sit behind Pro, so you’ll occasionally hit a paywall mid-design and need to swap assets or simplify.
Photopea cleans up photos when Canva can’t
You’re halfway through a Canva design and realize the photo is the problem: a crooked horizon, messy background, glare on packaging, or a logo that needs a clean cutout. Canva can handle light tweaks, but it gets tight when you need layered edits, precise selections, or a real clone/heal pass to remove a distracting object.
Photopea is the free “Photoshop-style” option that runs in a browser, so you can do the fix and then return to Canva. Use it for jobs like cutting out hair edges, removing a background when the auto tool fails, cleaning dust spots, straightening product shots, or working with PSD files a client sends you. Save a transparent PNG for Canva, or keep a layered file if you’ll revisit the edit.
The cost is learning curve and speed. The interface is dense, and big files can lag on older laptops, so keep your edits focused and practical.
CapCut makes short videos feel like a real edit

You shoot a decent clip, then the “quick edit” problem shows up: the pacing drags, the audio jumps, and every platform wants a different size. CapCut solves the basics without feeling like a toy. You can trim on the beat, snap clips together with clean transitions, add auto-captions for talking-head videos, and export a vertical 9:16 MP4 that doesn’t look like a screen recording.
Use CapCut for short promos, product demos, behind-the-scenes clips, and repurposing one video into multiple cuts. Drop in B-roll, add simple text callouts, and keep a saved style (fonts, caption placement, intro/outro) so your videos match across weeks. The real snag is consistency: some templates, effects, and higher-end features are locked behind a paid tier, and trending effects can change or disappear, which can break a repeatable workflow. That’s why it helps to keep edits simple and reusable—then you can focus on the script.
ChatGPT turns scattered notes into publishable drafts
You open a doc to write a post and your “outline” is really a pile of bullets: a few customer questions, three half-formed points, and a link you don’t want to lose. ChatGPT is useful when you treat it like a drafting assistant, not a fact source. Paste your notes, specify the format (“800-word blog,” “5-slide carousel copy,” “30-second voiceover”), and add constraints like tone, audience, and a clear call to action. You’ll get a draft you can shape instead of starting from zero.
The real cost is supervision. If your prompt is vague, the output will be generic, and it can invent details that sound plausible—prices, features, even “quotes.” Keep it on rails by providing your real inputs (offer, examples, FAQs), then ask for two versions: one tight, one friendly. Edit for accuracy, add your proof points, and then pair the draft with visuals that won’t create licensing headaches.
Pexels helps you source visuals without licensing anxiety
You’re ready to publish, but you’re missing one piece: a clean background photo, a short B-roll clip, or a simple texture that won’t look like a default stock watermark. Pexels is a solid “grab-and-go” library for creators because you can search by keyword, filter for photos or videos, and download fast without building a complicated workflow.
Use it to fill the gaps: a lifestyle image behind your headline text in Canva, a quick cutaway shot for CapCut, or a neutral scene to support a blog header. Still, don’t treat “free” as “risk-free.” Check the license terms, avoid anything with recognizable logos, and be careful with faces for sensitive topics. Also expect repeats—popular images show up everywhere—so plan to crop, color-grade, or layer text so it feels like yours. That sets you up to test your full free stack in a real week.
Your first free-tool stack and a one-week test
A typical week looks like this: you need one promo graphic, one short video, one cleaned-up photo, and a caption that doesn’t waste your audience’s time. Treat that as your first “stack”: Canva for layouts, Photopea for any fussy photo fixes, CapCut for the edit, ChatGPT for the first draft, and Pexels only when you’re missing a visual.
Run a one-week test with real deadlines. Publish 3 posts and 1 short video, and track four things: time-to-finish, export limits, reuse (can you duplicate and stay consistent?), and any “surprise” paywalls. If one tool blocks a must-have—like transparent PNGs, clean captions, or usable exports—that’s your signal to swap it before you build habits around it.